Laser Cutting Machine Operation: Safety & Efficiency Guide
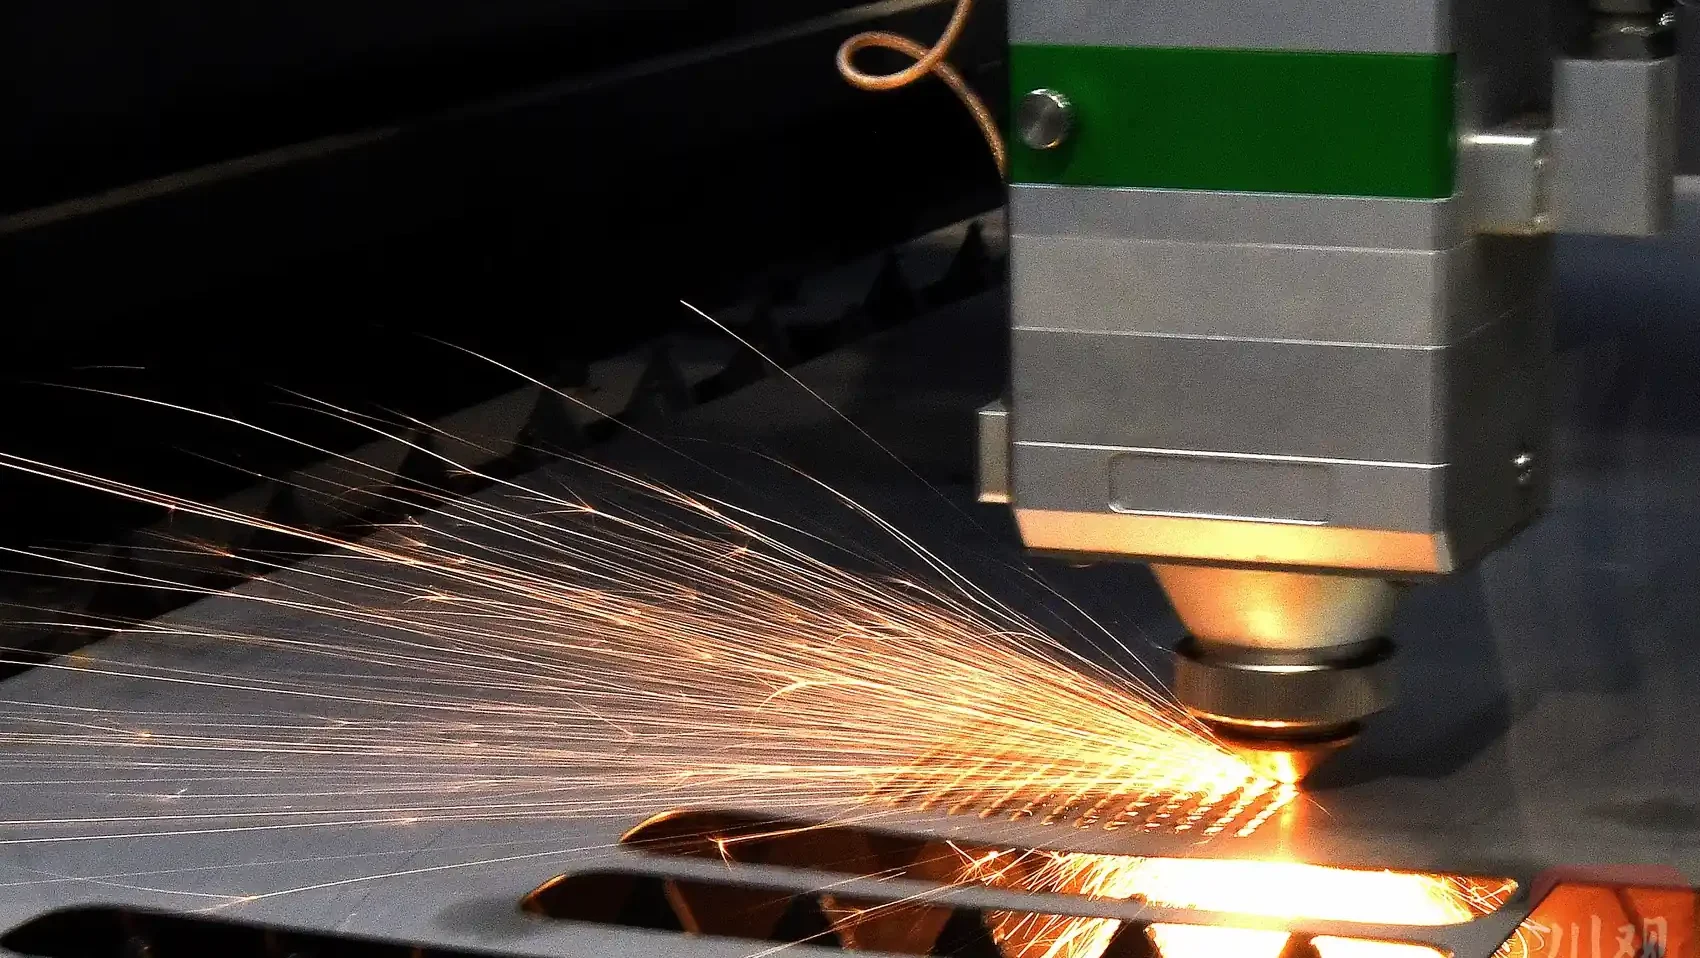
Laser cutting machine operation safely and efficiently requires strict adherence to protocols to ensure high-quality results and protect both the operator and the equipment. This comprehensive guide details the step-by-step processes for starting and shutting down a laser cutting machine, preparing for cutting tasks, selecting optimal lead-in lines, performing calibrations, and implementing essential safety and maintenance practices. By following these procedures, operators can maximize performance, extend machine lifespan, and maintain a safe working environment. This guide is designed to address common user queries like “how to operate a laser cutting machine” and “laser cutting safety tips,” providing actionable insights for both novice and experienced operators.Laser cutting machines are vital tools in industries like manufacturing, automotive, and design, offering unmatched precision for cutting materials.
Starting the Laser Cutting Machine Operration
Startup Procedure
Properly starting a laser cutting machine is critical for safe and effective operation, requiring a meticulous sequence of steps to initialize all systems correctly.
Power Initialization: Begin by turning on the main power switch, typically located on the machine’s control panel or power supply unit, ensuring a stable power source to avoid electrical issues. Power on the computer connected to the machine and activate the water chiller system to cool the laser tube, preventing overheating. Verify that the chiller water temperature reaches at least 18°C (64.4°F), allowing the chiller to run until it stabilizes if the temperature is too low.
Axis Activation: Activate the X, Y, and Z axes through the control software or panel, with X and Y axes controlling horizontal and vertical movement and the Z axis adjusting the cutting head’s height. Inspect the axes visually to ensure no debris or obstructions are present on guide rails or racks, and listen for unusual noises that may signal mechanical issues.
Software Configuration: Open the cutting software, such as CypCut or RDWorks, depending on the machine model. Set step settings to 0.01 for precise movements and select options like cutting mode or material type. Access the CNC menu, open the diagnostic window, and manually move the Y and X axes to confirm responsiveness and calibrate positions if needed.
Homing and Lubrication: Perform a homing operation to reset the machine to its origin point, aligning the cutting head for accurate cuts. Select the lubrication file in the software, preview the path, and run it in idle mode for 5 minutes to lubricate components like guide rails and gears, reducing friction and wear. Check the lubrication tank and refill with No. 46 machine oil if levels are low.
Laser Activation: Unlock the laser with the small key switch, and once the control screen lights up, press the green button to activate the laser source, powering the laser tube. In the software, enable the red light for positioning, open the shutter to allow the laser beam to pass, and set the air pressure to 1.4 bar for optimal gas flow during cutting or engraving.
Final Verification: Confirm that all systems—power, axes, software, lubrication, and laser—are functioning correctly. Check the control panel for error messages to ensure the machine is ready for operation.
This detailed startup process minimizes risks and prepares the laser cutting machine for precise, efficient operation.
Shutting Down the Laser Cutting Machine
Shutdown Procedure
Proper shutdown procedures are essential to protect the laser cutting machine and ensure its longevity, preventing damage and operational issues in future sessions.
Laser Deactivation: Turn off the laser by closing the key switch to power down the laser tube, preventing unnecessary wear. In the cutting software, disable the red light and close the shutter to block accidental laser emission, ensuring safety during shutdown.
Axis and Pump Deactivation: Deactivate the X and Y axes (labeled “Machine Tool” in the software) and the Z axis (labeled “Follow” for height adjustment) to stop all mechanical movements. Turn off the water pump by selecting the “STOP” function to halt the chiller, but in colder climates, such as winter, keep the pump running to prevent water from freezing in the system.
Software and Power Shutdown: Close the cutting software to ensure no background processes are running, then shut down the computer to avoid software conflicts during the next startup. Turn off the main power switch to de-energize the machine, but in colder environments, leave the main power on to maintain system warmth and prevent freezing.
Special Considerations: Non-critical steps, like minor software settings, can be skipped to streamline the process, but the laser and axes must always be deactivated properly. After shutdown, inspect the machine for signs of wear, leaks, or debris to address potential issues before the next session.
These steps ensure the machine is safely powered down, maintaining its condition for future use.
Pre-Cutting Preparations
Preparation Steps
Thorough preparation before a cutting task is vital to achieve high-quality results and ensure operator safety.
Machine Inspection: Conduct a thorough inspection of the laser cutting machine’s components, including the laser head, copper nozzle, ceramic ring, and lenses, checking for wear, cracks, or debris that could compromise performance. Ensure guide rails, gears, and racks are clean and lubricated, removing any iron filings or dust to prevent interference with movement.
Parameter Optimization: Select cutting parameters based on the material’s properties, such as type, thickness, and density, adjusting laser power, cutting speed, focus position, and auxiliary gas type (e.g., nitrogen, oxygen, or air). Verify that the copper nozzle size matches the material thickness and that gas pressure is within the recommended range of 0.5–2.0 bar.
Workpiece Positioning and Alignment: Position the workpiece accurately on the cutting bed, aligning the starting point with the material’s far point to maximize efficiency and minimize waste. Confirm the cutting sequence in the software for logical progression, ensuring the cutting frame stays within the material’s dimensions. Mark coordinates on the workpiece to guide the cutting path for precision.
Machine Calibration and Preheating: Calibrate the machine by adjusting the Z-axis height and verifying X and Y axis positions to align the laser head with the workpiece. Preheat the machine for 5–10 minutes to stabilize the laser and mechanical components, enhancing cutting accuracy.
Operator Preparedness: Ensure the operator is trained in the machine’s operation, safety protocols, software usage, emergency stop procedures, and troubleshooting techniques to handle any issues during cutting.
These preparations create a solid foundation for precise, efficient, and safe laser cutting operations.
Lead-In Line Recommendations
Lead-In Line Selection
Selecting the appropriate lead-in line is critical for achieving clean, precise cuts and minimizing material defects.
Lead-In Line Length: For workpieces up to 6mm thick, use a 3mm lead-in line to ensure a smooth entry into the material. For workpieces 6–12mm thick, opt for a 3–4mm lead-in line to accommodate increased material resistance.
Spacing and Aperture: Maintain workpiece spacing of 5–6mm, greater than the lead-in line length, to prevent overlap or interference between cuts. Set the cutting aperture 0.5–1mm larger than the material thickness to ensure clean cuts and prevent slag buildup.
Calibration Process for Lead-In Accuracy: Position the cutting head (Z-axis) approximately 1mm above the workpiece to avoid contact during calibration. On the control panel, select the F1 key to initiate calibration, choose “2 Floating Head” mode for precise height adjustment, and press the ENT key to start. After completion, press ENT again to confirm. The calibration result must be rated “Excellent” or “Good”; if lower, repeat the process.
Practical Tips: Double-check lead-in line settings in the software to match material specifications. Test the settings on a scrap piece of the same material to confirm optimal performance before cutting the main workpiece.
These steps ensure high-quality cuts and efficient material use.
Calibration Requirements
Calibration Process
Calibration is essential to maintain the laser cutting machine’s precision and prevent operational errors.
After Component Replacement: Perform calibration after replacing the copper nozzle or ceramic ring due to wear or damage to ensure proper alignment with the laser beam.
Unstable Performance: If the machine exhibits jittering, inconsistent following, or erratic movements, recalibrate to restore stability and ensure consistent performance.
Capacitance Changes: Monitor the machine’s capacitance via the control panel. Significant changes, such as sudden increases or decreases, necessitate recalibration to maintain cutting accuracy.
Error Conditions: If touching the copper nozzle does not reset capacitance to “0” or triggers a red light alarm, halt calibration immediately and investigate issues like electrical faults or debris to prevent machine damage.
Calibration Best Practices: Conduct calibration in a controlled environment free from vibrations or interference. Document results to track trends and identify recurring issues over time.
Regular calibration ensures reliable performance and minimizes errors during cutting tasks.
Safety Measures and Maintenance Protocols
Safety and Maintenance Guidelines
Safety and maintenance are critical to protect operators, ensure high-quality cuts, and extend the laser cutting machine’s lifespan.
Protective Gear: Operators must wear laser safety goggles rated for the machine’s wavelength to protect against harmful radiation. Gloves and protective clothing should be used when handling materials or cleaning to avoid burns or cuts.
Operational Checks: During startup, verify the step setting (0.01), lubrication adequacy, and successful homing. Monitor the laser beam’s alignment with the copper nozzle during cutting, pausing to realign if it deviates to maintain cut quality.
Component Maintenance: Inspect the copper nozzle and ceramic ring every 2–3 days for wear or slag buildup, cleaning or replacing as needed. Check laser lenses weekly, cleaning with a lint-free cloth and approved solution to prevent distortion or power loss.
Lubrication and Cleaning: Refill the lubrication tank with No. 46 machine oil weekly if low. Clean guide rails daily to remove iron filings, dust, or debris, and apply grease to gears and racks every 7 days. Lubricate the laser head’s rack weekly with grease for smooth operation.
Water System Maintenance: Clean the water tank’s isolation net monthly, replace the filter as needed, and change the water every 2–3 months to maintain cleanliness and prevent clogs. Verify correct water pipe connections (outlet to inlet, inlet to outlet) for proper flow.
General Maintenance: Check limit stops weekly for tightness to prevent misalignment. Clean the control panel fan and cutting head surfaces daily. Empty the oil collection box and scrap cart daily. Address oil shortage or axis alarms by disconnecting, cleaning, and reconnecting the signal line.
Pressure and Perforation Monitoring: Monitor air pressure to ensure stability (e.g., 1.4 bar). When increasing perforation speed, verify holes are fully penetrated to avoid damage to the copper nozzle or lenses, which could trigger capacitance alarms.
These protocols create a safe and efficient operating environment, ensuring consistent performance.
Troubleshooting Common Issues
Troubleshooting Tips
Even with proper procedures, issues may arise during operation, requiring prompt troubleshooting to minimize downtime.
Inconsistent Cuts: A misaligned laser beam or worn copper nozzle may cause inconsistent cuts. Realign the beam and replace the nozzle to restore cut quality.
Machine Jittering: Uncalibrated axes or insufficient lubrication can lead to jittering. Recalibrate the machine and apply grease to guide rails and racks to resolve the issue.
Capacitance Alarms: Faulty nozzle contact or electrical issues may trigger capacitance alarms. Inspect the nozzle and connections, clean the system, and avoid calibration until the issue is resolved.
Overheating: Inadequate chiller performance or low water levels can cause overheating. Check the chiller temperature and water levels, and clean or replace the filter as needed.
Proactive troubleshooting ensures consistent performance and minimizes operational disruptions.
Conclusion
Laser cutting machine operation requires precision, attention to detail, and a commitment to safety. By following detailed procedures for starting and shutting down, preparing for cutting tasks, selecting optimal lead-in lines, performing regular calibrations, and implementing robust safety and maintenance protocols, operators can achieve high-quality cuts and extend the machine’s lifespan. This guide offers a comprehensive framework for both novice and experienced operators to maximize efficiency and safety in laser cutting operations, delivering professional results that meet industry standards.

Metalworking specialist with 12 years of experience in sheet metal fabrication and press brake applications, certified by ASME.