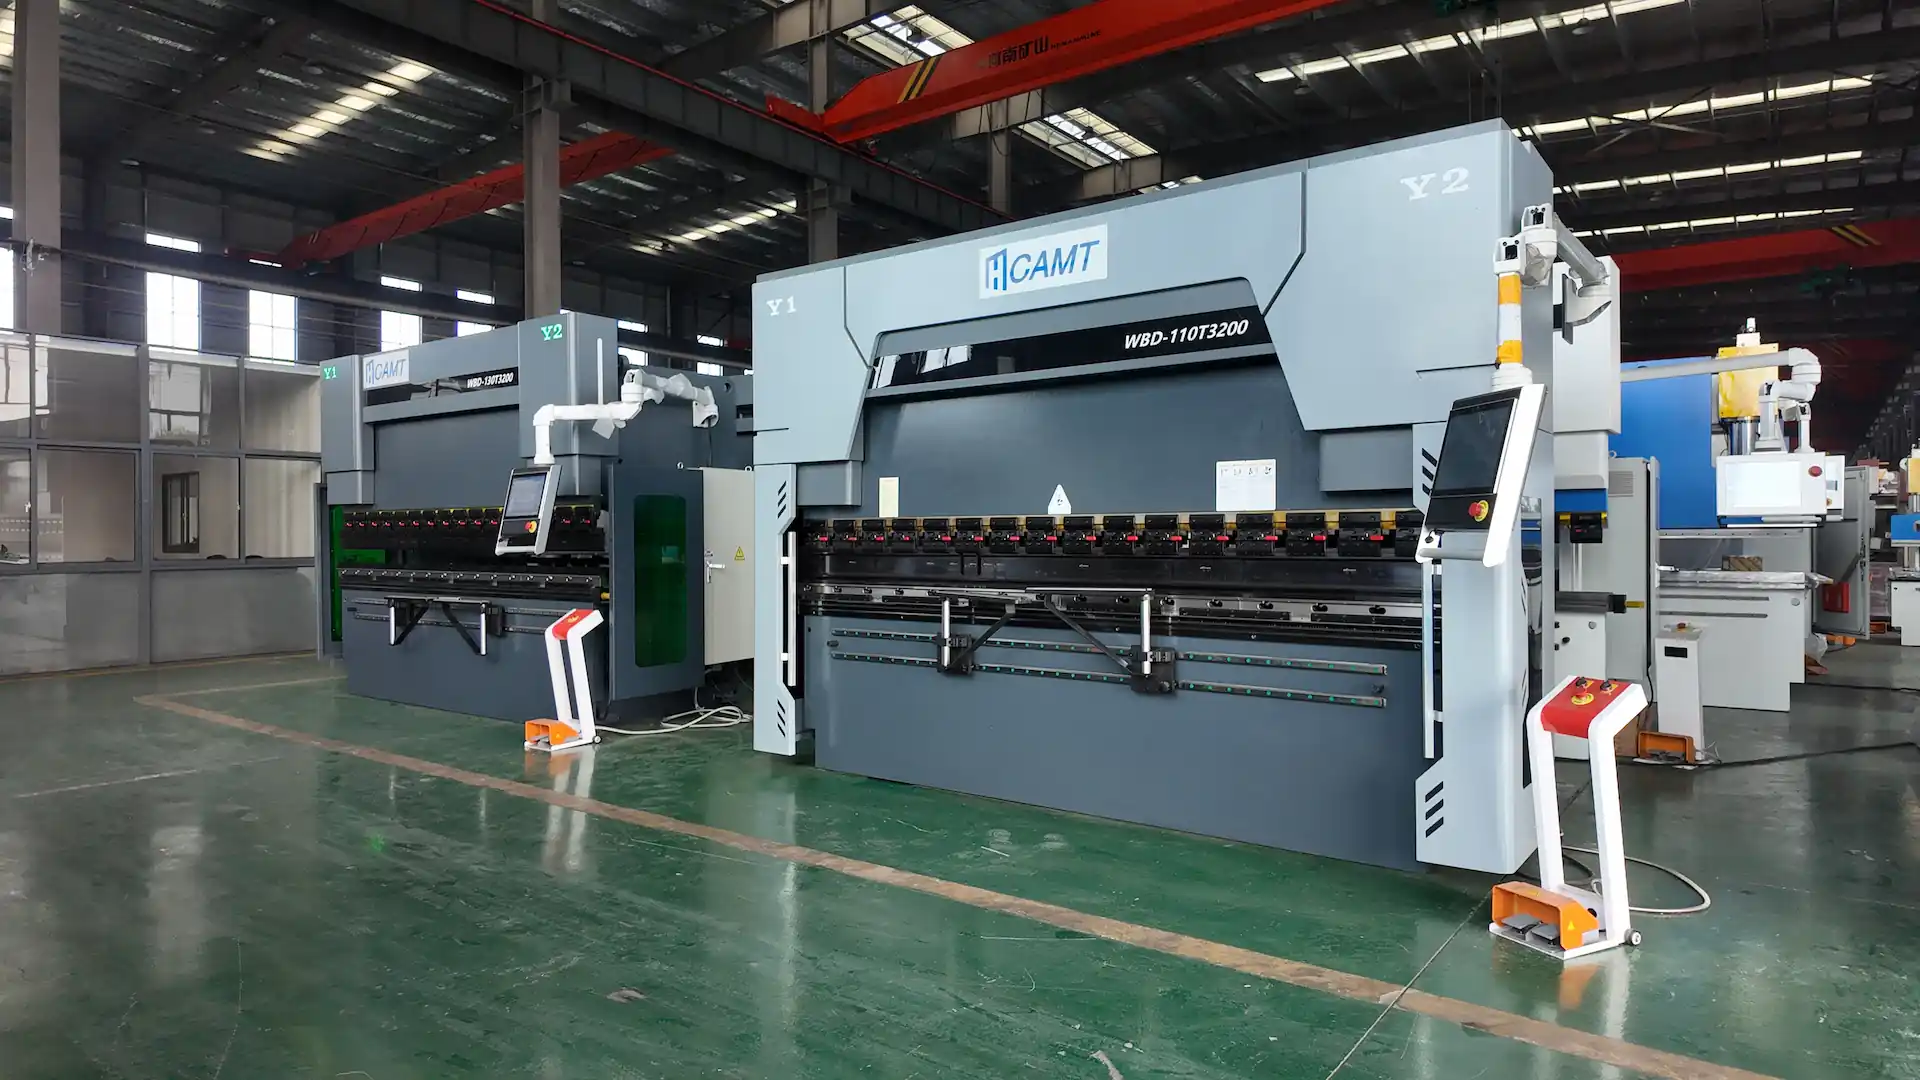
Common CNC Press Brake Faults and Solutions
Fault 1: Low-Voltage Circuit Breaker Trips After Oil Pump Starts.

: The circuit breaker trips immediately after starting the oil pump.
Phase loss in the power supply.
Severely clogged high-pressure filter, increasing motor current.
Low-voltage circuit breaker setting too low.Check Power Supply.
: Use a multimeter to confirm all phases are present. Correct wiring if phase loss is detected.Inspect Filter.
: Replace the high-pressure filter if clogged, ensuring proper oil flow.:
Adjust Breaker: Increase the circuit breaker setting to match the motor’s rated current, per manufacturer specifications.
: Monitor power supply stability and replace filters regularly.Fault 2: Failure to Locate Reference Point During Startup.
: The press brake cannot find the reference point, halting operation.Loose grating scale readhead connection, preventing alignment with the reference point.
Regular maintenance is critical to ensuring the longevity and efficiency of your sheet metal equipment. Our preventive maintenance program is designed to keep your machines running at peak performance, minimizing downtime and maximizing productivity.Reconnect Grating Scale.
: Press the red stop button, secure the grating scale readhead, and manually lower the slider to align with the lower mold. Return to the reference point in semi-automatic or automatic mode.
Correct Shutdown Procedure: Manually lower the slider to align molds before shutdown, then restart and return to the reference point.
: Use a multimeter to confirm all phases are present. Correct wiring if phase loss is detected.Fault 3: System Screen Shows No Display, Appears Grayish-White, with Blinking Programming Key Indicator.
: Replace the high-pressure filter if clogged, ensuring proper oil flow.:
: Overloaded program buffer memory due to uncleared programs.Initialize System.
: Disconnect the main power, press “+ +” and “- -” keys simultaneously, then power on to enter initialization mode.Clear Memory.
: Input “1” to select the project, enter password “817,” and confirm to clear the buffer.: Clear unused programs after each job to prevent memory overload.
Fault 4: Inaccurate Grating Scale Counting, Causing Bending Angle Errors
Correct Shutdown Procedure: Grating scale feedback signal drops pulses due to contamination or poor installation.
: Use a multimeter to confirm all phases are present. Correct wiring if phase loss is detected.: Disassemble and clean the grating scale, ensuring dust and vibration protection.
: Replace the high-pressure filter if clogged, ensuring proper oil flow.:
: Redesign any improper mounting to enhance stability.Repair or Replace.
: Return faulty grating scales to the manufacturer for repair or replacement.: Implement dust covers and vibration-dampening measures for grating scales.
Fault 5: “X” or “R” Axis Safety Distance Alarm After Programming: The system alarms and halts due to safety distance violations.
: Input “1” to select the project, enter password “817,” and confirm to clear the buffer.Reprogram Parameters.
: Adjust the mold or program settings to eliminate conflicts.
Correct Shutdown Procedure: Check “X” and “R” axis limit settings in the control system.
: Use a multimeter to confirm all phases are present. Correct wiring if phase loss is detected.Fault 6: “X” or “R” Axis Drive Motor Error Alarm.
: Replace the high-pressure filter if clogged, ensuring proper oil flow.:
16# Alarm: Motor overload due to excessive mechanical resistance.22# Alarm: Encoder feedback signal issues from poor connections or interference.
For 16# Alarm: Inspect “X” and “R” axis transmission for flexibility, addressing excessive resistance or mechanical limits.
For 22# Alarm: Check encoder connections for loose contacts, disconnection, or signal interference.
Regular maintenance is critical to ensuring the longevity and efficiency of your sheet metal equipment. Our preventive maintenance program is designed to keep your machines running at peak performance, minimizing downtime and maximizing productivity.Fault 7: Discrepancy Between “Y1” and “Y2” Axis Displayed and Actual Positions.
: The control system shows incorrect “Y1” and “Y2” axis positions.
: Inaccurate reference point calibration.
Reinitialize Reference Point
Correct Shutdown Procedure: Perform reference point calibration after major adjustments or power interruptions.
: Use a multimeter to confirm all phases are present. Correct wiring if phase loss is detected.:
: The displayed “X” or “R” axis positions do not match their actual positions.
: Axis positions were moved during power-off, while the system retained the pre-shutdown position.
Reinitialize Axes.
: Replace the high-pressure filter if clogged, ensuring proper oil flow.:
: Disconnect the main power, press “+ +” and “- -” keys simultaneously, then power on to enter initialization mode.Fault 9: “Y1” and “Y2” Axis Position Deviation Exceeds Allowable Synchronization Range.
: The slider cannot move due to excessive deviation between “Y1” and “Y2” axes.: Improper shutdown without aligning the slider with molds, causing deviation from tool drop.
Adjust Parameters: Increase the synchronization deviation range by Ascending 5mm in system parameters.
: Input “1” to select the project, enter password “817,” and confirm to clear the buffer.: Enter manual mode, lower the slider, and allow the system to auto-correct the position.
: Always align the slider with molds before shutdown to prevent deviation.
Correct Shutdown ProcedureFor more information on CNC press brake maintenance or advanced troubleshooting, contact your equipment supplier or refer to the manufacturer’s manual.
: Use a multimeter to confirm all phases are present. Correct wiring if phase loss is detected.:
油面が低く、給油口が露出して充填不足の原因となっている。.
早送り速度が速すぎ、充填不足につながっている。.
油の汚染により、充填バルブのバルブコアが固着している。.
: Replace the high-pressure filter if clogged, ensuring proper oil flow.:
油面点検: 給油口が完全に浸るように、油面が給油口より5mm上にあることを確認してください。必要に応じて、メーカー推奨の作動油を補充してください。.
速度調整: システムパラメータを変更して早送り速度を下げ、十分な充填時間を確保してください。.
充填バルブ清掃: 充填バルブを分解して清掃し、バルブコアのスムーズな動きを回復させてください。.
Regular maintenance is critical to ensuring the longevity and efficiency of your sheet metal equipment. Our preventive maintenance program is designed to keep your machines running at peak performance, minimizing downtime and maximizing productivity.: 定期的に油面と油質を監視し、必要に応じて油を交換またはろ過してください。.
故障3:スライダーの戻り、早送りは正常だが、手動低速下降が弱い。
Correct Shutdown Procedure: スライダーは戻りおよび早送りモードでは正常に動作しますが、手動低速下降時には力がありません。.
: Use a multimeter to confirm all phases are present. Correct wiring if phase loss is detected.:
「二位置四方」バルブの故障により、充填バルブが開きっぱなしになっている。.
汚染による充填バルブの固着。.
: Replace the high-pressure filter if clogged, ensuring proper oil flow.:
バルブ動作点検: 方向制御バルブが通電しているか、固着していないかを確認してください。電気的故障を修理するか、バルブコアを解放してください。.
充填バルブ清掃:充填バルブを分解、清掃、潤滑し、スムーズな動作を確保します。.
: Input “1” to select the project, enter password “817,” and confirm to clear the buffer.:高品質の作動油を使用し、汚染リスクを最小限に抑えるためにフィルターを取り付けます。.
故障4:スライダーの戻り速度が遅く、戻り圧力が高い
Correct Shutdown Procedure:スライダーの戻りが遅く、戻り圧力が異常に高い。.
: Use a multimeter to confirm all phases are present. Correct wiring if phase loss is detected.:充填バルブが完全に開いておらず、オイルの流れを制限している。.
: Replace the high-pressure filter if clogged, ensuring proper oil flow.:
故障3の解決策を参照:充填バルブを清掃し、方向制御バルブが適切に動作しているか確認します。.
追加確認:油圧ポンプの性能を確認し、流量制限がないことを確認します。.
: Input “1” to select the project, enter password “817,” and confirm to clear the buffer.:バルブの詰まりを防ぐため、油圧システムの定期的なメンテナンスを計画します。.
3. プレスブレーキの電気系統の故障と解決策
電気系統の故障はCNCプレスブレーキの動作を妨げ、多くの場合、精密な診断が必要です。以下に一般的な問題とその解決策を示します。.
故障1:オイルポンプ起動後に低電圧回路ブレーカーがトリップする
Correct Shutdown Procedure:オイルポンプ起動直後に回路ブレーカーがトリップする。.
: Use a multimeter to confirm all phases are present. Correct wiring if phase loss is detected.:
電源の欠相。.
高圧フィルターがひどく詰まっており、モーター電流が増加している。.
低電圧回路ブレーカーの設定が低すぎる。.
: Replace the high-pressure filter if clogged, ensuring proper oil flow.:
電源を確認する: マルチメーターを使用して、すべての相が存在することを確認します。相の欠落が検出された場合は、配線を修正します。.
フィルターを点検する: 高圧フィルターが詰まっている場合は交換し、適切なオイルの流れを確保します。.
ブレーカーを調整する: メーカーの仕様に従い、モーターの定格電流に合わせて回路ブレーカーの設定を上げます。.
: Input “1” to select the project, enter password “817,” and confirm to clear the buffer.: 電源の安定性を監視し、フィルターを定期的に交換します。.
故障2:起動時に基準点を見つけられない
Correct Shutdown Procedure: プレスブレーキが基準点を見つけられず、動作が停止します。.
: Use a multimeter to confirm all phases are present. Correct wiring if phase loss is detected.:
グレーティングスケールの読み取りヘッドの接続が緩んでおり、基準点とのアライメントを妨げている。.
不適切なシャットダウンにより、スライダーが上死点から離れたままになっている。.
: Replace the high-pressure filter if clogged, ensuring proper oil flow.:
グレーティングスケールを再接続する: 赤い停止ボタンを押し、グレーティングスケールの読み取りヘッドを固定し、スライダーを手動で下げて下型に合わせます。半自動または自動モードで基準点に戻ります。.
正しいシャットダウン手順: シャットダウン前にスライダーを手動で下げて金型を合わせ、その後再起動して基準点に戻ります。.
: Input “1” to select the project, enter password “817,” and confirm to clear the buffer.: オペレーターに適切なシャットダウン手順を訓練し、グレーティングスケールの接続を定期的に確認します。.
故障3: システム画面に表示がなく、灰色がかった白に見え、プログラミングキーインジケーターが点滅している
Correct Shutdown Procedure: 制御システム画面が空白または灰色で、プログラミングキーが点滅する。.
: Use a multimeter to confirm all phases are present. Correct wiring if phase loss is detected.: 未クリアのプログラムによるプログラムバッファメモリの過負荷。.
: Replace the high-pressure filter if clogged, ensuring proper oil flow.:
システムの初期化: 主電源を切断し、「+ +」キーと「- -」キーを同時に押し、その後電源を入れて初期化モードに入る。.
メモリのクリア: プロジェクトを選択するために「1」を入力し、パスワード「817」を入力し、バッファをクリアするために確認する。.
: Input “1” to select the project, enter password “817,” and confirm to clear the buffer.: メモリの過負荷を防ぐため、各作業後に未使用のプログラムをクリアする。.
故障4: グレーティングスケールのカウントが不正確で、曲げ角度エラーを引き起こす
Correct Shutdown Procedure: 「Y1」軸と「Y2」軸の位置決めの累積誤差が、不正確な曲げ角度につながる。.
: Use a multimeter to confirm all phases are present. Correct wiring if phase loss is detected.: 汚染または不適切な設置のため、グレーティングスケールのフィードバック信号がパルスをドロップする。.
: Replace the high-pressure filter if clogged, ensuring proper oil flow.:
グレーティングスケールの清掃: グレーティングスケールを分解して清掃し、防塵および防振を確保する。.
設置の改善: 不適切な取り付けを再設計し、安定性を向上させる。.
修理または交換:故障したグレーティングスケールは、修理または交換のためメーカーに返却してください。.
: Input “1” to select the project, enter password “817,” and confirm to clear the buffer.:グレーティングスケールには、ダストカバーと防振対策を施してください。.
故障5:「X」または「R」軸の安全距離アラーム(プログラミング後)
Correct Shutdown Procedure:安全距離違反により、システムがアラームを発し停止します。.
: Use a multimeter to confirm all phases are present. Correct wiring if phase loss is detected.:金型安全距離設定、「X」または「R」軸の制限、およびプログラムされた位置間の競合。.
: Replace the high-pressure filter if clogged, ensuring proper oil flow.:
パラメータを再プログラムする:競合を解消するために、金型またはプログラム設定を調整してください。.
制限を確認する:制御システムで「X」および「R」軸の制限設定を確認してください。.
: Input “1” to select the project, enter password “817,” and confirm to clear the buffer.:金型構成との互換性を確保するため、セットアップ中にプログラムパラメータを検証してください。.
故障6:「X」または「R」軸駆動モーターエラーアラーム
Correct Shutdown Procedure:システムがモーターエラーアラームを表示します(例:過負荷の場合は16#、エンコーダの問題の場合は22#)。.
: Use a multimeter to confirm all phases are present. Correct wiring if phase loss is detected.:
16#アラーム:過度の機械的抵抗によるモーターの過負荷。.
22#アラーム:接続不良または干渉によるエンコーダフィードバック信号の問題。.
: Replace the high-pressure filter if clogged, ensuring proper oil flow.:
16#アラームの場合:「X」および「R」軸の伝達部の柔軟性を検査し、過度の抵抗や機械的制限に対処してください。.
22#アラームについて:エンコーダ接続の緩み、断線、または信号干渉を確認してください。.
: Input “1” to select the project, enter password “817,” and confirm to clear the buffer.:伝送部品を定期的に潤滑し、エンコーダケーブルを電磁干渉から保護してください。.
故障7:Y1軸とY2軸の表示位置と実際の位置の不一致
Correct Shutdown Procedure:制御システムがY1軸とY2軸の誤った位置を表示しています。.
: Use a multimeter to confirm all phases are present. Correct wiring if phase loss is detected.:基準点校正が不正確です。.
: Replace the high-pressure filter if clogged, ensuring proper oil flow.:
基準点の再初期化:Y1軸とY2軸を再校正し、実際の位置に合わせます。.
: Input “1” to select the project, enter password “817,” and confirm to clear the buffer.:主要な調整後または停電後に基準点校正を実行してください。.
故障8:システムのX軸またはR軸の表示位置と実際の位置の不一致
Correct Shutdown Procedure:表示されているX軸またはR軸の位置が実際の位置と一致しません。.
: Use a multimeter to confirm all phases are present. Correct wiring if phase loss is detected.:電源オフ中に軸位置が移動しましたが、システムはシャットダウン前の位置を保持しています。.
: Replace the high-pressure filter if clogged, ensuring proper oil flow.:
軸の再初期化:制御システムでX軸とR軸の位置を再校正してください。.
: Input “1” to select the project, enter password “817,” and confirm to clear the buffer.:電源オフ中に軸が手動で移動されないようにしてください。.
故障9:Y1軸とY2軸の位置偏差が許容同期範囲を超えています
Correct Shutdown Procedure: The slider cannot move due to excessive deviation between “Y1” and “Y2” axes.
: Use a multimeter to confirm all phases are present. Correct wiring if phase loss is detected.: Improper shutdown without aligning the slider with molds, causing deviation from tool drop.
: Replace the high-pressure filter if clogged, ensuring proper oil flow.:
Adjust Parameters: Increase the synchronization deviation range by Ascending 5mm in system parameters.
Manual Correction: Enter manual mode, lower the slider, and allow the system to auto-correct the position.
: Input “1” to select the project, enter password “817,” and confirm to clear the buffer.: Always align the slider with molds before shutdown to prevent deviation.
Press brake maintenance and repair should be viewed as an ongoing process rather than a reaction to failure. Proper lubrication, careful hydraulic system management, and regular mechanical inspection form the foundation of reliable machine operation. These practices not only reduce downtime but also help maintain consistent bending accuracy over the machine’s service life.
Maintaining a CNC press brake requires proactive troubleshooting and regular maintenance. By addressing mechanical, hydraulic, and electrical faults promptly using the solutions outlined above, you can minimize downtime and ensure consistent bending accuracy. Implement a routine maintenance schedule, train operators on proper procedures, and use high-quality components to extend the lifespan of your press brake.
For more information on CNC press brake maintenance or advanced troubleshooting, contact your equipment supplier or refer to the manufacturer’s manual.

V-Grooving Machine
- Press Brake
- Laser Cutting Machine
- Shearing Machine
- Press Brake Safety Precautions: Complete Guide for Safe Operation and Maintenance
- Hydraulic Press Machine
- Read more about Practical Methods for Press Brake Accuracy with Long Term Precision
- Rolling Machine
- Ironworker
- Press Brake Tooling
- Machinery Accessories