These protocols create a safe and efficient operating environment, ensuring consistent performance.
Troubleshooting Common Issues.
Troubleshooting Tips
Even with proper procedures, issues may arise during operation, requiring prompt troubleshooting to minimize downtime.
Inconsistent Cuts.
: A misaligned laser beam or worn copper nozzle may cause inconsistent cuts. Realign the beam and replace the nozzle to restore cut quality.Machine Jittering.
: Uncalibrated axes or insufficient lubrication can lead to jittering. Recalibrate the machine and apply grease to guide rails and racks to resolve the issue.Capacitance Alarms.
: Faulty nozzle contact or electrical issues may trigger capacitance alarms. Inspect the nozzle and connections, clean the system, and avoid calibration until the issue is resolved.Overheating.
: Inadequate chiller performance or low water levels can cause overheating. Check the chiller temperature and water levels, and clean or replace the filter as needed.Proactive troubleshooting ensures consistent performance and minimizes operational disruptions.
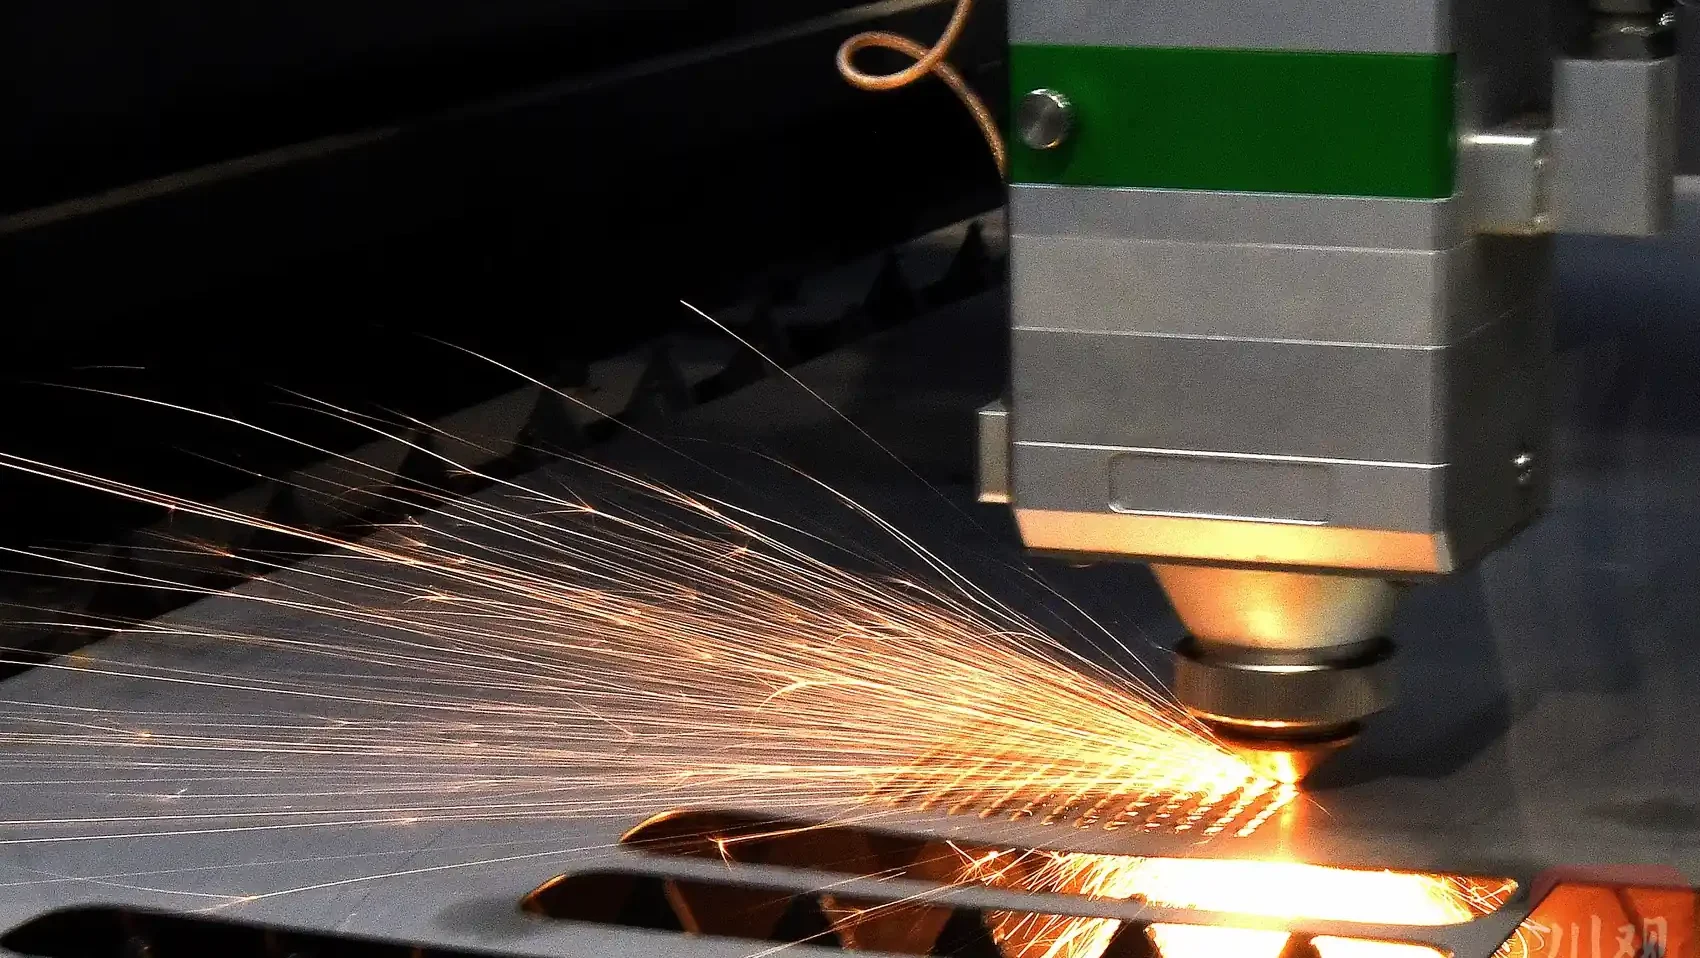
Laser cutting machine operation requires precision, attention to detail, and a commitment to safety. By following detailed procedures for starting and shutting down, preparing for cutting tasks, selecting optimal lead-in lines, performing regular calibrations, and implementing robust safety and maintenance protocols, operators can achieve high-quality cuts and extend the machine’s lifespan. This guide offers a comprehensive framework for both novice and experienced operators to maximize efficiency and safety in laser cutting operations, delivering professional results that meet industry standards.Laser Cutting Machine Operation.
Laser Cutting Machine Operation Guide: Safety & EfficiencyThorough preparation before a cutting task is vital to achieve high-quality results and ensure operator safety.
Machine Inspection.
: Conduct a thorough inspection of the laser cutting machine’s components, including the laser head, copper nozzle, ceramic ring, and lenses, checking for wear, cracks, or debris that could compromise performance. Ensure guide rails, gears, and racks are clean and lubricated, removing any iron filings or dust to prevent interference with movement.
Parameter Optimization
: Select cutting parameters based on the material’s properties, such as type, thickness, and density, adjusting laser power, cutting speed, focus position, and auxiliary gas type (e.g., nitrogen, oxygen, or air). Verify that the copper nozzle size matches the material thickness and that gas pressure is within the recommended range of 0.5–2.0 bar.
Workpiece Positioning and Alignment: Position the workpiece accurately on the cutting bed, aligning the starting point with the material’s far point to maximize efficiency and minimize waste. Confirm the cutting sequence in the software for logical progression, ensuring the cutting frame stays within the material’s dimensions. Mark coordinates on the workpiece to guide the cutting path for precision.
Machine Calibration and Preheating: Calibrate the machine by adjusting the Z-axis height and verifying X and Y axis positions to align the laser head with the workpiece. Preheat the machine for 5–10 minutes to stabilize the laser and mechanical components, enhancing cutting accuracy.
Operator Preparedness: Ensure the operator is trained in the machine’s operation, safety protocols, software usage, emergency stop procedures, and troubleshooting techniques to handle any issues during cutting.
These preparations create a solid foundation for precise, efficient, and safe laser cutting operations.Lead-In Line Recommendations.
Lead-In Line Selection.
Selecting the appropriate lead-in line is critical for achieving clean, precise cuts and minimizing material defects.
Lead-In Line Length
: For workpieces up to 6mm thick, use a 3mm lead-in line to ensure a smooth entry into the material. For workpieces 6–12mm thick, opt for a 3–4mm lead-in line to accommodate increased material resistance.
Spacing and Aperture: Maintain workpiece spacing of 5–6mm, greater than the lead-in line length, to prevent overlap or interference between cuts. Set the cutting aperture 0.5–1mm larger than the material thickness to ensure clean cuts and prevent slag buildup.
Calibration Process for Lead-In Accuracy: Position the cutting head (Z-axis) approximately 1mm above the workpiece to avoid contact during calibration. On the control panel, select the F1 key to initiate calibration, choose “2 Floating Head” mode for precise height adjustment, and press the ENT key to start. After completion, press ENT again to confirm. The calibration result must be rated “Excellent” or “Good”; if lower, repeat the process.
Practical Tips: Double-check lead-in line settings in the software to match material specifications. Test the settings on a scrap piece of the same material to confirm optimal performance before cutting the main workpiece.
These steps ensure high-quality cuts and efficient material use.Calibration Requirements.
Calibration ProcessCalibration is essential to maintain the laser cutting machine’s precision and prevent operational errors.
After Component Replacement.
: Perform calibration after replacing the copper nozzle or ceramic ring due to wear or damage to ensure proper alignment with the laser beam.
Unstable Performance
: If the machine exhibits jittering, inconsistent following, or erratic movements, recalibrate to restore stability and ensure consistent performance.
Capacitance Changes: Monitor the machine’s capacitance via the control panel. Significant changes, such as sudden increases or decreases, necessitate recalibration to maintain cutting accuracy.
Error Conditions: If touching the copper nozzle does not reset capacitance to “0” or triggers a red light alarm, halt calibration immediately and investigate issues like electrical faults or debris to prevent machine damage.
Calibration Best Practices: Conduct calibration in a controlled environment free from vibrations or interference. Document results to track trends and identify recurring issues over time.
Regular calibration ensures reliable performance and minimizes errors during cutting tasks.Safety Measures and Maintenance Protocols.
Safety and Maintenance Guidelines.
Safety and maintenance are critical to protect operators, ensure high-quality cuts, and extend the laser cutting machine’s lifespan.
Protective Gear
: Operators must wear laser safety goggles rated for the machine’s wavelength to protect against harmful radiation. Gloves and protective clothing should be used when handling materials or cleaning to avoid burns or cuts.
Operational Checks: During startup, verify the step setting (0.01), lubrication adequacy, and successful homing. Monitor the laser beam’s alignment with the copper nozzle during cutting, pausing to realign if it deviates to maintain cut quality.
Component Maintenance: Inspect the copper nozzle and ceramic ring every 2–3 days for wear or slag buildup, cleaning or replacing as needed. Check laser lenses weekly, cleaning with a lint-free cloth and approved solution to prevent distortion or power loss.
Lubrication and Cleaning: Refill the lubrication tank with No. 46 machine oil weekly if low. Clean guide rails daily to remove iron filings, dust, or debris, and apply grease to gears and racks every 7 days. Lubricate the laser head’s rack weekly with grease for smooth operation.
Water System Maintenance: Clean the water tank’s isolation net monthly, replace the filter as needed, and change the water every 2–3 months to maintain cleanliness and prevent clogs. Verify correct water pipe connections (outlet to inlet, inlet to outlet) for proper flow.
General Maintenance: Check limit stops weekly for tightness to prevent misalignment. Clean the control panel fan and cutting head surfaces daily. Empty the oil collection box and scrap cart daily. Address oil shortage or axis alarms by disconnecting, cleaning, and reconnecting the signal line.
Pressure and Perforation Monitoring.
: Monitor air pressure to ensure stability (e.g., 1.4 bar). When increasing perforation speed, verify holes are fully penetrated to avoid damage to the copper nozzle or lenses, which could trigger capacitance alarms.
These protocols create a safe and efficient operating environment, ensuring consistent performance.
Troubleshooting Common Issues.
Troubleshooting TipsEven with proper procedures, issues may arise during operation, requiring prompt troubleshooting to minimize downtime.
Inconsistent Cuts: A misaligned laser beam or worn copper nozzle may cause inconsistent cuts. Realign the beam and replace the nozzle to restore cut quality.
Machine Jittering: Uncalibrated axes or insufficient lubrication can lead to jittering. Recalibrate the machine and apply grease to guide rails and racks to resolve the issue.
Capacitance Alarms: Faulty nozzle contact or electrical issues may trigger capacitance alarms. Inspect the nozzle and connections, clean the system, and avoid calibration until the issue is resolved.
Overheating: Inadequate chiller performance or low water levels can cause overheating. Check the chiller temperature and water levels, and clean or replace the filter as needed.
Proactive troubleshooting ensures consistent performance and minimizes operational disruptions.Laser cutting machine operation requires precision, attention to detail, and a commitment to safety. By following detailed procedures for starting and shutting down, preparing for cutting tasks, selecting optimal lead-in lines, performing regular calibrations, and implementing robust safety and maintenance protocols, operators can achieve high-quality cuts and extend the machine’s lifespan. This guide offers a comprehensive framework for both novice and experienced operators to maximize efficiency and safety in laser cutting operations, delivering professional results that meet industry standards.
Read more about Principle and Function of Press Brake Safety Protection SystemRead more about Press Brake Maintenance and Repair.
Read more about Practical Methods for Press Brake Accuracy with Long Term Precision.
Read more about Practical Guidance For Press Brake Operation
Read more about How to Properly Install a Press Brake Machine
Laser Cutting Machine Operation.
일관성 없는 절단: 레이저 빔 정렬 불량 또는 마모된 구리 노즐로 인해 절단이 일관되지 않을 수 있습니다. 빔을 재정렬하고 노즐을 교체하여 절단 품질을 복원하십시오.
기계 떨림: 보정되지 않은 축 또는 불충분한 윤활은 떨림을 유발할 수 있습니다. 기계를 재보정하고 가이드 레일과 랙에 그리스를 도포하여 문제를 해결하십시오.
정전 용량 경보: 노즐 접촉 불량 또는 전기적 문제로 인해 정전 용량 경보가 발생할 수 있습니다. 노즐과 연결부를 검사하고 시스템을 청소하며, 문제가 해결될 때까지 보정을 피하십시오.
과열: 부적절한 냉각기 성능 또는 낮은 수위는 과열을 유발할 수 있습니다. 냉각기 온도와 수위를 확인하고 필요에 따라 필터를 청소하거나 교체하십시오.
사전 예방적 문제 해결은 일관된 성능을 보장하고 운영 중단을 최소화합니다.
Conclusion
레이저 절단기 작동은 정밀성, 세부 사항에 대한 주의, 그리고 안전에 대한 헌신을 요구합니다. 시작 및 종료에 대한 상세한 절차를 따르고, 절단 작업을 준비하고, 최적의 리드인 라인을 선택하고, 정기적인 보정을 수행하며, 강력한 안전 및 유지보수 프로토콜을 구현함으로써 작업자는 고품질 절단을 달성하고 기계의 수명을 연장할 수 있습니다. 이 가이드는 초보 및 숙련된 작업자 모두에게 레이저 절단 작업에서 효율성과 안전을 극대화하고, 산업 표준을 충족하는 전문적인 결과를 제공하기 위한 포괄적인 프레임워크를 제공합니다.

Metalworking specialist with 12 years of experience in sheet metal fabrication and press brake applications, certified by ASME.